Bootstrap Checkbox Button
Introduction
Sometimes the most basic aspects might become very required-- most especially as you get to need them. As an example precisely how do your visitors interact with the pages you build specifying a basic Boolean act-- simply just yes or no referring to a number of the thoughts you should ask, just how they do consent to the conditions and terms or perhaps line up a handful of the achievable choices they might have. We normally get past this with no paying very much of an interest to the component responsible for these types of actions still, the Bootstrap Checkbox Form is certainly a really significant element-- one our forms can not actually do without.
Inside the most updated fourth edition of the Bootstrap framework we are provided with the
.form-check.form-check-label<div>.form-check.form-check-label<label><input>.form-check-inputWays to employ the Bootstrap checkbox:
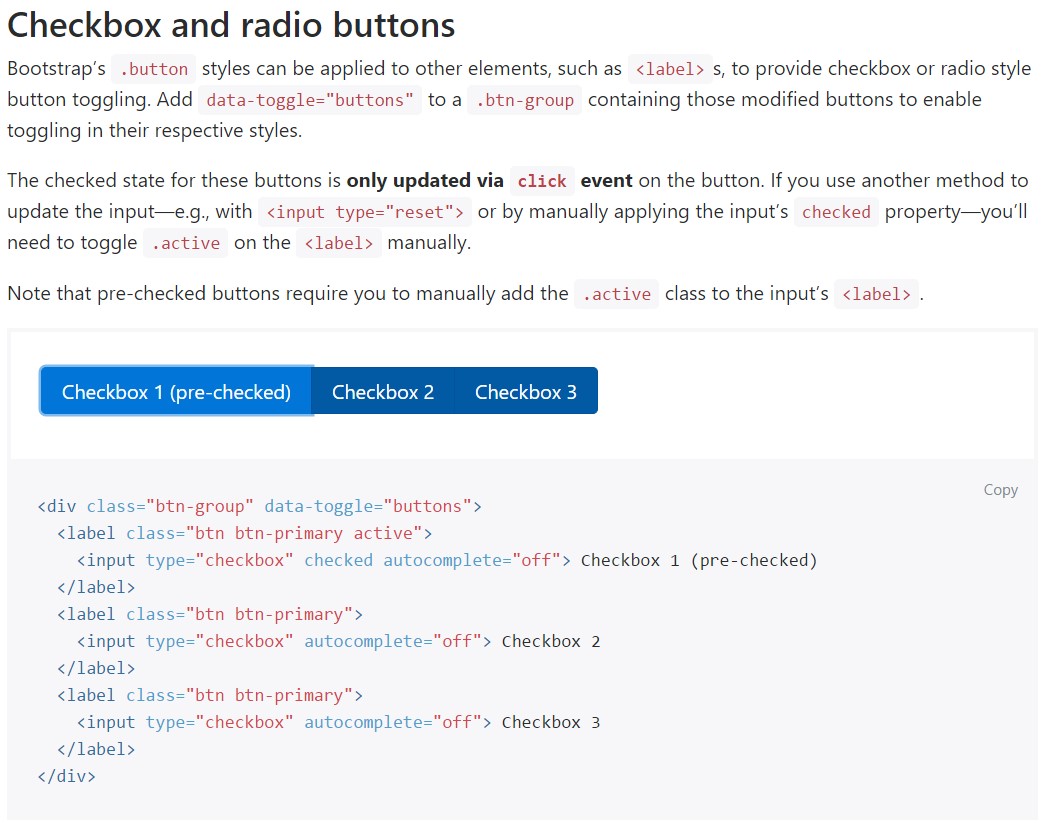
The examined condition for such buttons is only up-dated with click event on the button. If you put to use an additional option to modify the input-- e.g., with
<input type="reset">.active<label>
<div class="btn-group" data-toggle="buttons">
  <label class="btn btn-primary active">
    <input type="checkbox" checked autocomplete="off"> Checkbox 1 (pre-checked)
  </label>
  <label class="btn btn-primary">
    <input type="checkbox" autocomplete="off"> Checkbox 2
  </label>
  <label class="btn btn-primary">
    <input type="checkbox" autocomplete="off"> Checkbox 3
  </label>
</div>
In certain cases we need to have the checkboxes to be inside our forms without the customer actually being capable to bring any sort of action clicking them-- that is simply where the disabled option appears in.
Just to disable efficiently a checkbox in Bootstrap 4 applying the common HTML attribute
disabledIn case you like the concept and clearly would like to handle this you really should appoint the
.disabled.form-checkSome other good example
Whenever you are utilizing checkboxes, wrap them in a
<label>.custom-control.custom-checkboxEmploy
.custom-control-input<input>Additionally use two
<span>.custom-control-indicator.custom-control-description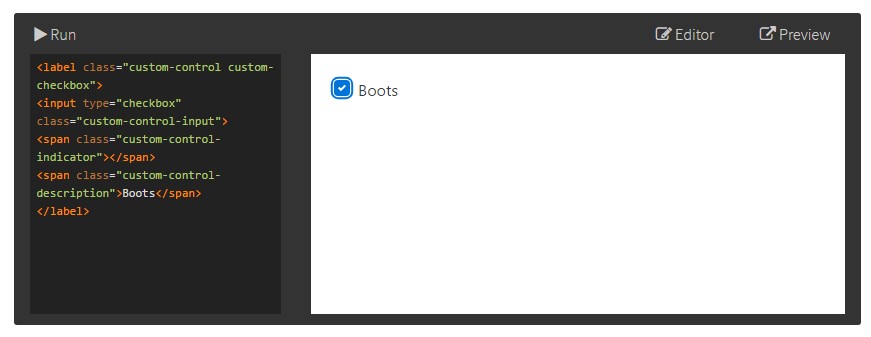
<label class="custom-control custom-checkbox">
<input type="checkbox" class="custom-control-input">
<span class="custom-control-indicator"></span>
<span class="custom-control-description">Boots</span>
</label>
Bootstrap Checkbox Design forms
Default radios and checkboxes are greatly enhanced upon with the assistance of
.form-checkThe disabled class will additionally light up the message colour to help identify the input's state.
A new detail for the Bootstrap edition 4 framework is the arrival of the so called custom made form features. These are the identical components we are used to within performance however designated much more interesting and also in the Bootstrap way. By using them you have the ability to add in special spice as well as personality to your content by simply just selecting a few special classes to the commands you feature in your forms.
In order to work with custom checkboxes wrap them within a
<label>.custom-control.custom-checkbox<input>.custom-control-input<span>.custom-control-indicator.custom-control-descriptionConclusions
That's literally all that you have to execute in order to include a checkbox component inside of your Bootstrap 4 powered website and add in some custom-made flavor to it including it a beautiful appearances. Now all you ought to do is repeat the drill unless you have actually examined all of the checkboxes desired are already on the webpage.
Take a look at a number of youtube video short training regarding Bootstrap checkbox
Related topics:
Bootstrap checkbox approved documents
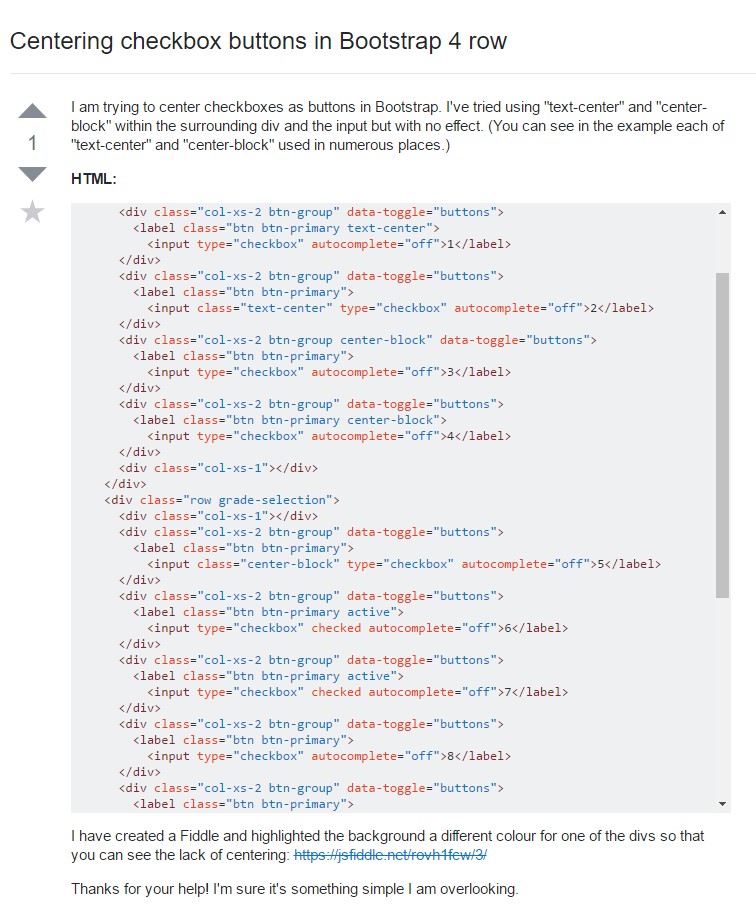
Centering checkbox buttons in Bootstrap 4 row
Make checkbox always visible in Bootstrap 4
