Part 1 - Adding folders with images or images to tutorial slideshow flash controller
From the Images menu, select Add images.... Browse to the location of the folder you'd like to add and select the images. You can also use Add images from folder..., Add images from Flickr... and Add images from Photobucket... options. 
Flash Slideshow Maker Maker will now include these pictures. Or you can drag the images (folder) to the Flash Slideshow Maker window. The image is copied to your pictures folder and automatically added to Flash Slideshow Gallery Cubecart. If you have included the images that you do not wish to be in the slideshow, you can easily remove them. Select all images that you wish to remove from slide show, and select Delete images.. from the Images menu. You can pick and choose pictures by holding the CTRL while clicking the pictures you like. 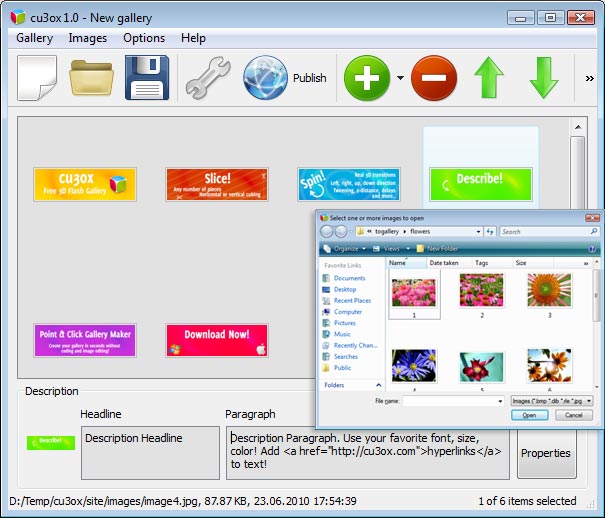
Part 2 - Adding description
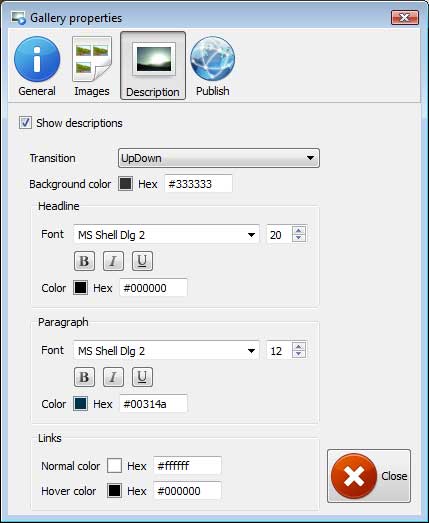
When you select an image you'll be able to add headline and paragraph for the description: - Headline - When you add images its name will appear in headline automatically.
- Paragraph - you can enter any comment or text about the image in the image slider.
Part 3 - Editing capabilities
In this slide show maker you can easily rotate your pictures using "Rotate Left" and "Rotate Right" buttons. Double click the picture to open it in your default graph editor. You can adjust the color of pictures, as well as fix red-eye and crop out unwanted parts of an image. Part 4 - Gallery properties
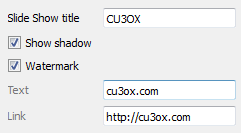
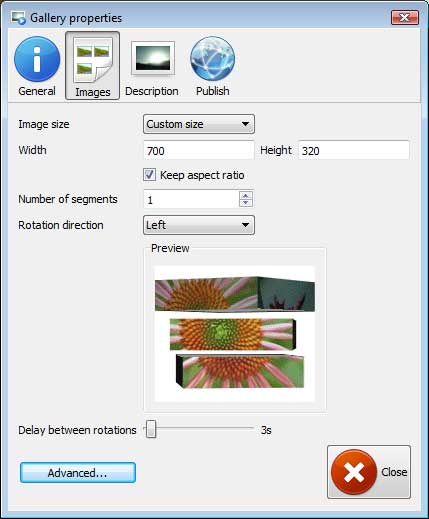
From the Gallery menu, select Properties or use "Properties" button on the toolbar  . On the first tab of the Gallery Properties window you can change the name of your as3 demos flash scroll and enable/disable the following properties: Shadow, Watermark. On the second tab of the Gallery Properties window you can select the size. Specify Number of segments, Rotation direction and Delay between rotations. The following rotation directions are available:
 Up effect Down effect Left effect Right effect
Click Advanced options button to specify the transition effect. 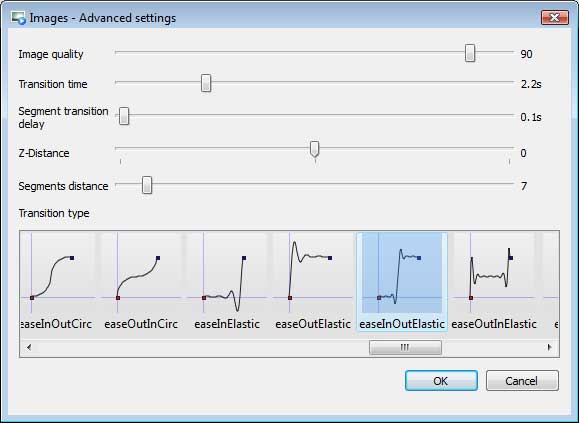
Part 5 - Publishing of the Flash Slideshow Maker Image slider
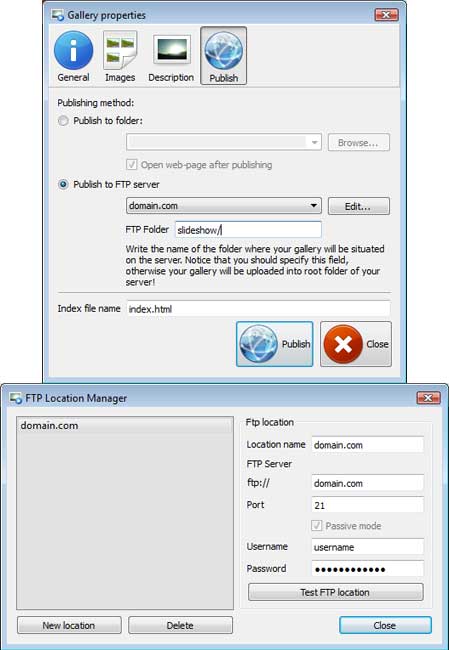
When you are ready to publish your slideshow online or to a local drive for testing you should go to "Gallery/Publish". Select the publishing method: publish to folder or publish to FTP server. - publish to folder. To select a local location on your hard drive, just click the Browse folders button and choose a location. Then click Ok. You can also set "Open web page after publishing" option.
- publish to FTP server. The FTP Location Manager window enables you to define a number of connections for use when uploading your slideshow to an FTP.
You are able to add a new FTP site by clicking "Edit" to the right of the "Publish to FTP server" drop down list. FTP Location Manager window will appear. Now type in a meaningful (this is not the actual hostname) name for your site and fill in the FTP details in the appropriate fields. You will have to type in your hostname, e.g. domain. The FTP port is normally located on port 21 thus this has been prefilled for you already. If your web site uses another port, you will have to enter it here. Type in your username and password for the connection. If you do not fill in this information, Flash Slideshow Maker is unable to connect to your site and thus not able to upload your slideshow to website. If this site enables anonymous connections, just type in anonymous as the username and your e-mail address as the password. You might want to change the Directory as well if you need to have your uploaded images placed in e.g. "www/gallery/". You can specify it in the FTP Folder field on the Publish window. Notice: Write the name of the folder where your slideshow will be placed on the server. Notice that you should specify this field; otherwise your slideshow will be uploaded into the root folder of your server!
Part 6 - Save your slide show as project file
When you exit CU3OX, you'll be asked if you want to save your project. The project consists of the pictures you choose to put on your slideshow and all your settings. It's a good idea to save the project, because that will allow you to change the project in case you decide to do something different with future slideshows. So click Yes, then enter a name for your project. To select the location of your project, just click the Browse folders button and choose a different location. Then click Save. Part 7 - Add Flash Slideshow Maker inside your own page
Flash Slideshow Maker Maker generates a special code. You can paste it in any place on your page where you want to add image slider. * Export flash gallery using Flash Slideshow Maker software in any test folder on a local drive.
* Open the generated index.html file in any text editor.
* Copy all code for Flash Slideshow Maker from the HEAD and BODY tags and paste it on your page in the HEAD tag and in the place where you want to have a flash gallery flickr integration (inside the BODY tag).
<body>
...
<!-- Start CU3OX.com BODY section -->
.....
<!-- End CU3OX.com BODY section -->
...</body>
* You can easily change the style of your image slider. Find the generated 'cu3oxXML.xml' file and open it in any text editor.


 . Make sure to include details on your CU3OX version, a link (or relevant code), operating system and a browser.free tutorial for flash papervision